NFS Stands for Network File System , is used to share files
between systems.In this Tutorail I will tell you how to install and configure
NFS Server and NFS Client
In here I am using 2 Redhat 6 systems
Server : webserver.dcageek.com
& 192.168.152.131
Client :
desktop.dcageek.com & 192.168.152.130
NFS Server Configuration
Step 1: Install NFS using yum command
#yum
install nfs* -y#chkconfig –list nfs
If it is OFF turn ON
#chkconfig nfs on
Step 3: Create a shared Directory in server
#chmod 755 stuff
Step 4: Add the shared folder location in exports file
#vi
/etc/exportsAdd the following line in exports file
/stuff 192.168.152.131/255.255.255.0 ro,sync,no_root_squash,no_all_squash)
Step 5: Restart the NFS Service
#service
nfs restartNFS Client Configuration
Step 6: Install NFS in client
Step 7: Start the Service
#service
nfs startStep 8: Check the shared directory is available or not
#showmount -e 192.168.152.131
Step 9: Create a Directory for mounting the shared directory of server
#mkdir /nfs
#mount –t nfs 192.168.152.131:/stuff /nfs
Step 11: For Verication use mount or df command
# df –h# mount
Check the files in nfs folder ,that are created inside stuff in server
Auto Mounting at Startup
Every time we need to give the command for mounting, instead we can auto mount at
the time of startup
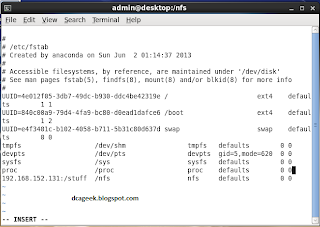
For that add the following entry in fstab
#vi /etc/fstab
192.168.152.131:/stuff
/nfs nfs defaults
0 0
Check it by giving df command
That’s it NFS Server and Client Configured …………….


No comments:
Post a Comment